Thursday, July 25, 2013

Summer Art adventures of the cire perdue kind! (or Ode to Bronze-casting) Part 2


Welcome back! I'll pick up where we left off in the last post about my experience with bronze-casting at Liminka art school. ((Click here to read Part 1!))

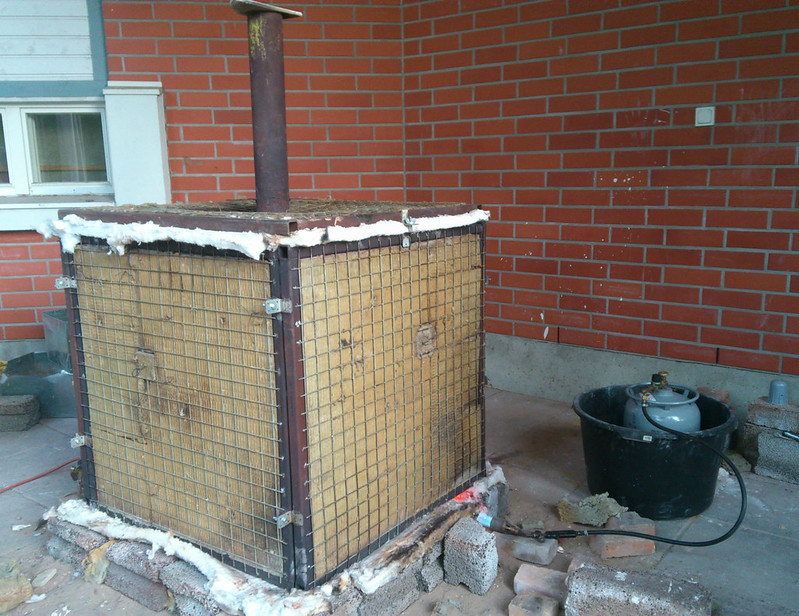
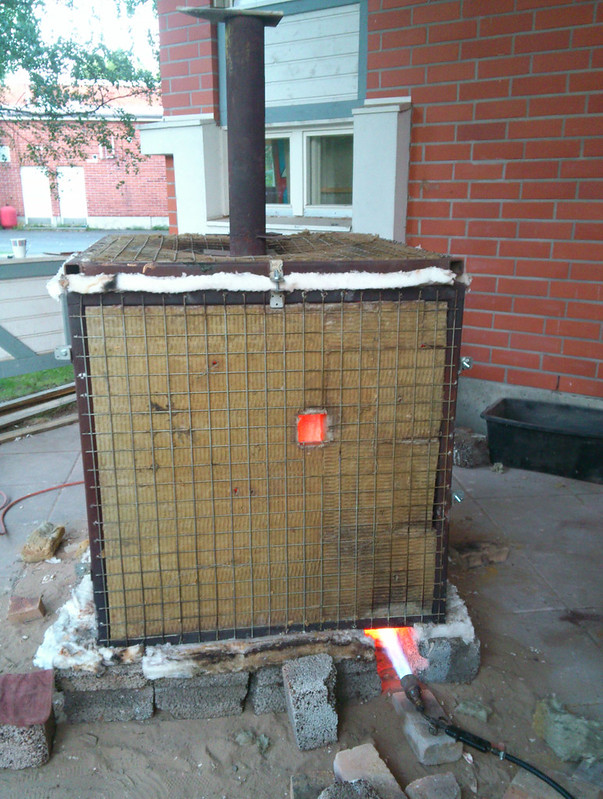
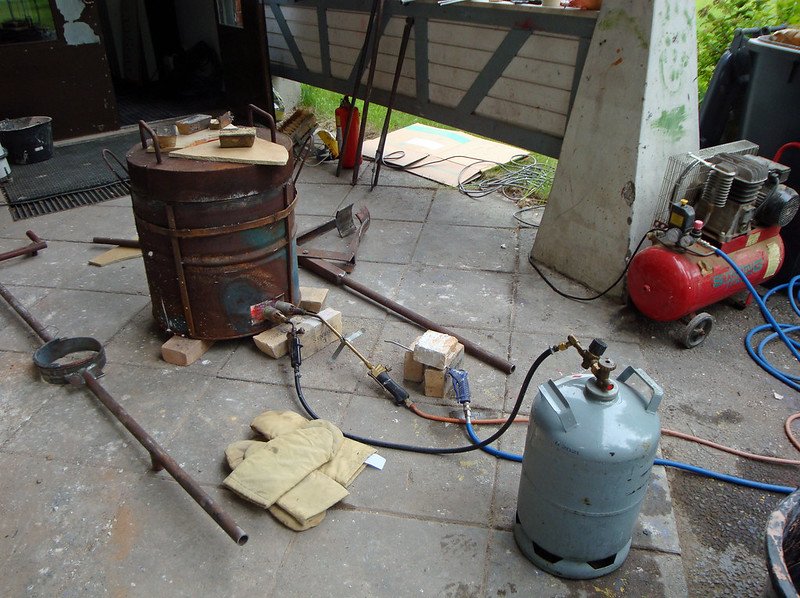
So, after we waited for the kiln (oven) to cool off over night, it was time to get things heated again the next day! What you see in this picture is bronze being heated (and melted) with burning gas. The melting point of bronze is somewhere near thousand degrees Celsius(ca. 1,742 °F) and even with burning gas being blasted continuously with full force into 
that iron bucket it took quite a while for the temperature to rise into such extremes.

...I don't know if that is what you can say "extremes" about when talking about temperature, but to me
- being pretty unexperienced with these kind of things - it seems like an extreme heat.
---

Tervetuloa takaisin! Jatkan siitä mihin jäimme viime postauksessa kokemuksistani pronssivaluun parissa Limingan taidekoulussa. ((Klikkaa tästä jos ykkösosa jäi lukematta!!))

Kun olimme odottaneet että uuni ja muotit jäähtyvät yön yli, seuraavana päivänä oli taas leikittävä tulella! Kuvassa pronssia kuumennetaan (ja siis sulatetaan) palavalla kaasulla. Pronssin sulamispiste on jossakin tuhannen celsiusasteen tienoilla, ja vaikka palavaa kaasua höökättiin täydellä liekillä tuohon rautatynnyriin otti ihan oman aikansa että lämpötila nousi sellaisiin lukemiin.

...en tiedä onko tuo jonkun kokeneemman metallinsulattajan mielestä alhainen lämpötila, mutta minusta, joka en ole paljoa tällaisia juttuja tehnyt se vaikutti todella äärimmäisyyksiin menevältä superkuumuudelta.


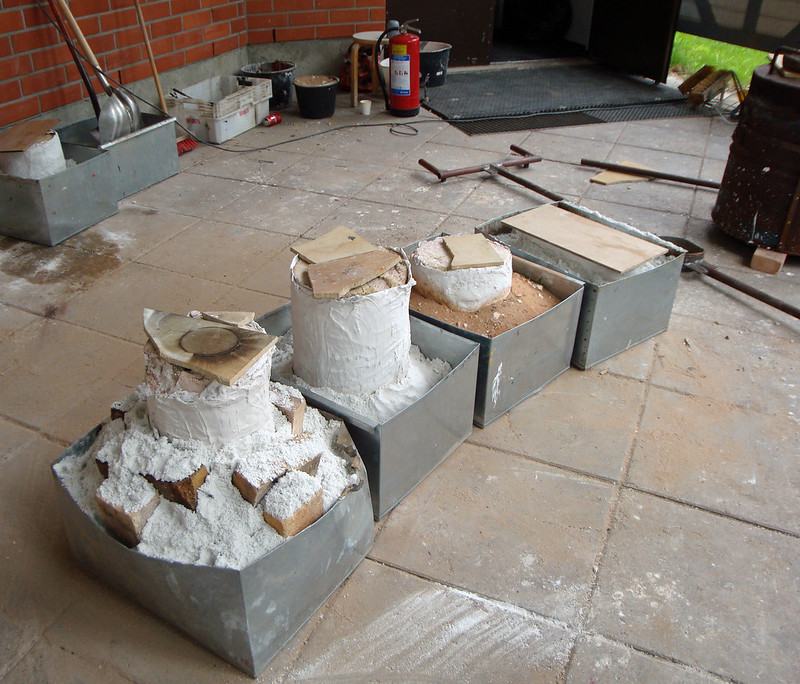
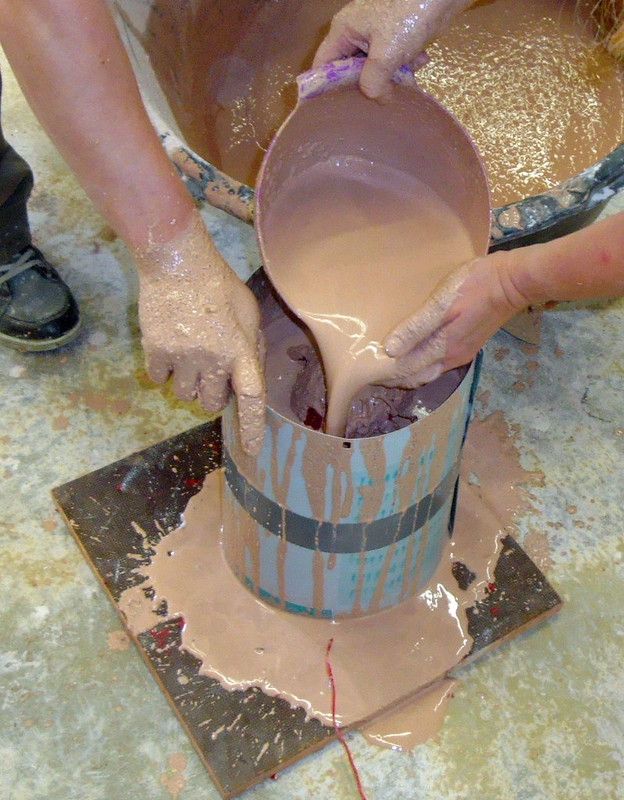
The molds were arraged into neat rows and propped up in sand to wait for the brnze to melt enough so it could be poured in.

---

Muotit järjestettiin siisteihin riveihin ja tuettiin hiekalla odottamaan pronssin sulamista jotta se voitaisiin kaataa niihin.

 ((Bronze casting in Liminka.)) 


Here's a short video clip I filmed of the bronze-pouring process.

---

Lyhyt video jonka kuvasin pronssin kaatamisesta.


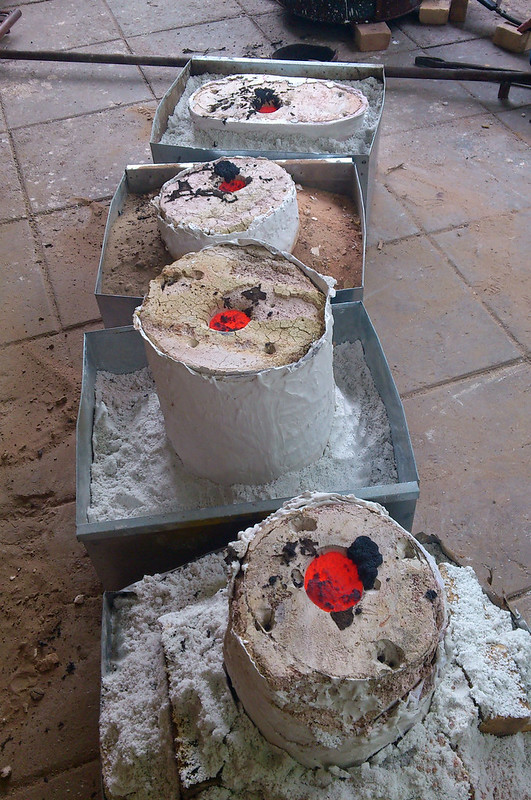
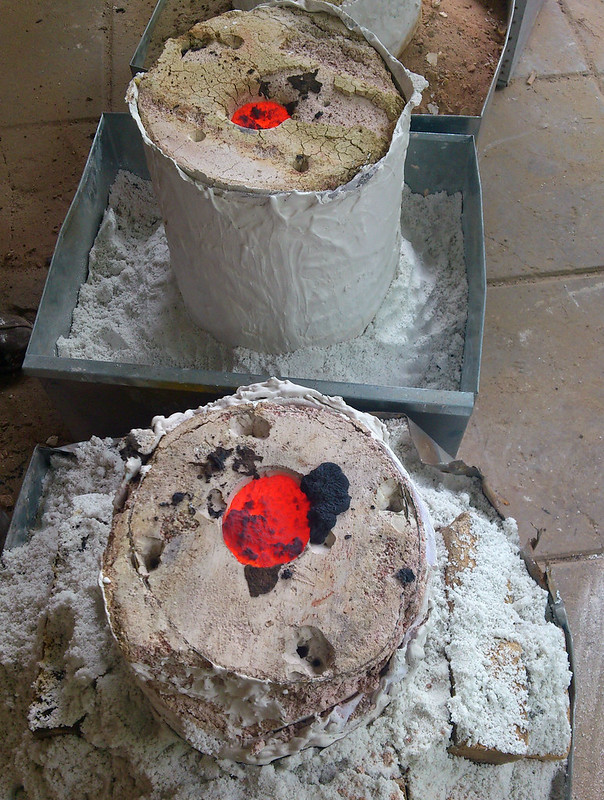
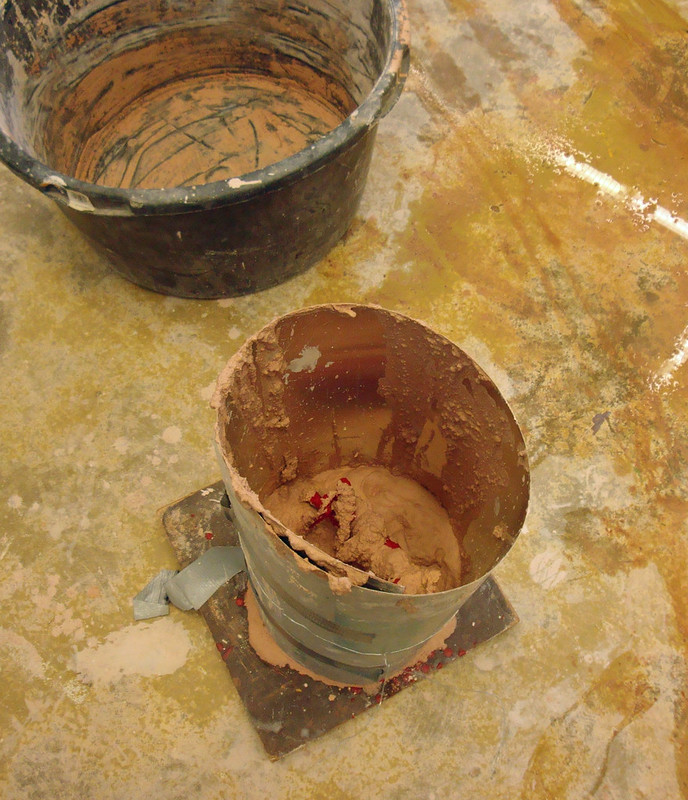
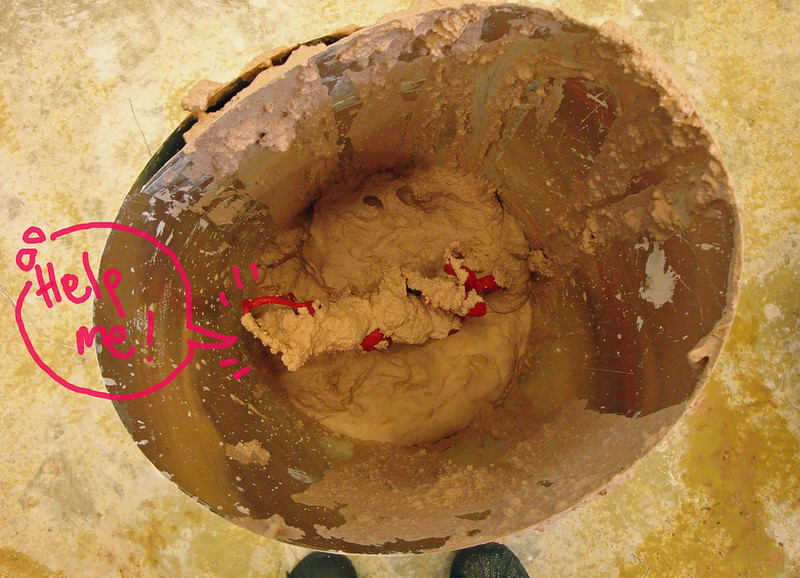
Bronze starts to harden and cool down immediately after being poured into the molds. It still takes some time until it has cooled enough that you can start taking the mold off.

---

Pronssi alkaa jähmettyä ja jäähtyä heti kun se on kaadettu muotteihin. Kestää kuitenkin vielä ennenkuin se on tarpeeksi jäähtynyt jotta muottia voi alkaa poistamaan valun ympäriltä.


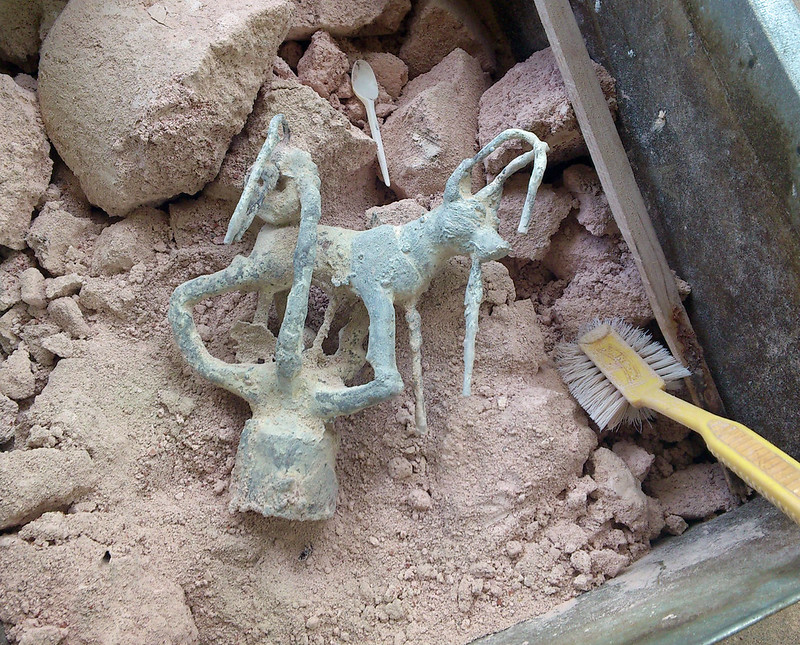
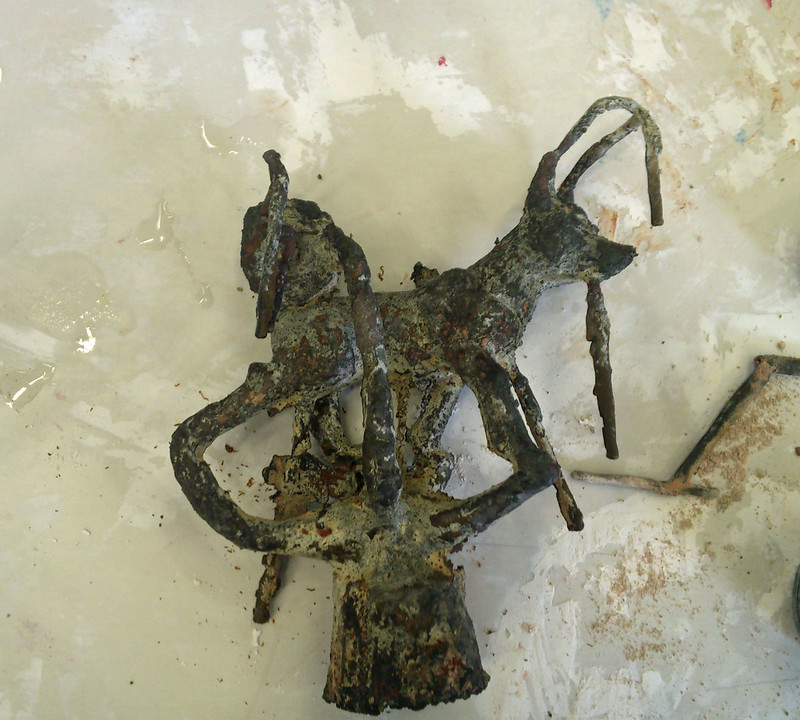
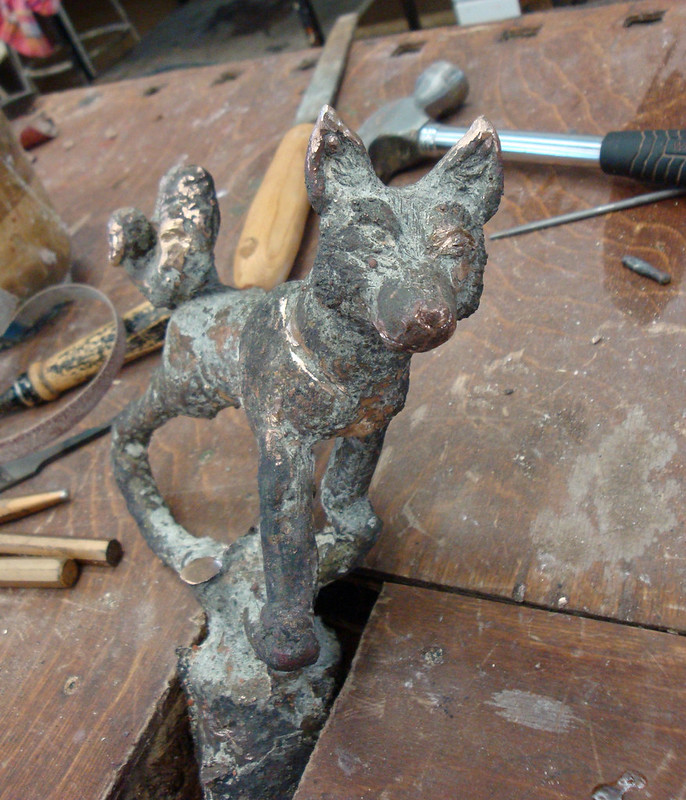
The excitement reaches its peak next day when the molds can be broken off from around the finished cast and the results can be seen!
I was happy to find out that my dog wasn't missing any parts and even his tail that was the trickiest part had been cast perfectly and the texture of his "fur" was clearly visible.

---

Seuraavana päivänä jännitys tiivistyi kun muotit voitiin rikkoa valmiin valun ympäriltä ja lopputulos tuli esiin!
Olin iloinen kun koiraltani ei puuttunut ainuttakaan osaa, jopa hankalan muotoinen häntäkin oli onnistunut hyvin ja "turkin" kuviointi oli selvästi näkyvissä.


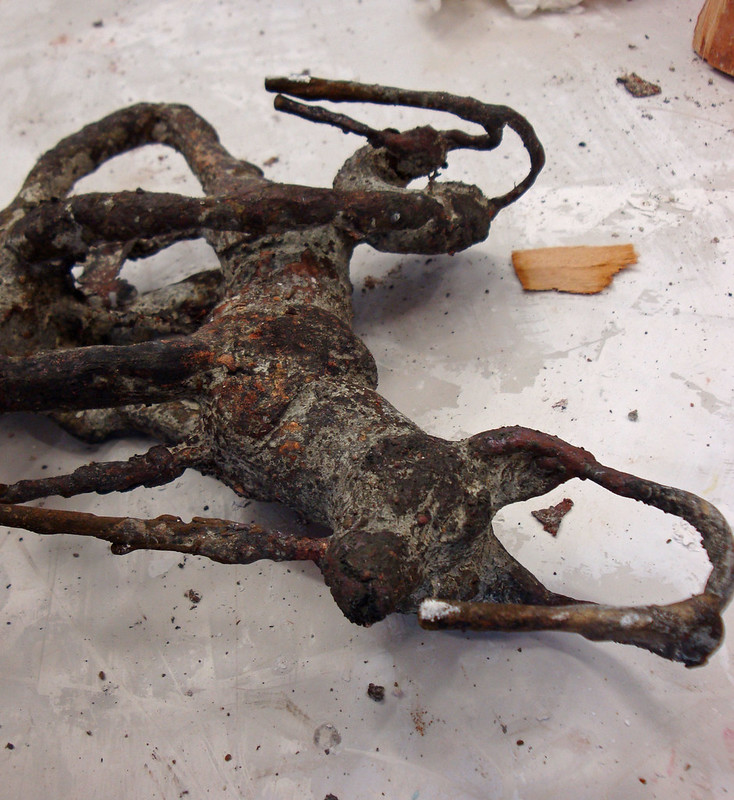
Brushing the remaining bits of the mold from the cast figure feels like excavating dinosaur bones, or playing an archaeologist. :-) 
Of course, there's still much to be done until it starts resembling anything like a sculpture.

---

Muotin viimeisten rippeiden harjaaminen valetun figuurin päältä tuntuu kuin olisi kaivamassa esiin dinosauruksen luita tai kuin leikkisi arkeologia. :-)
On tietenkin vielä paljon tekemistä ennen kuin työ alkaa näyttää yhtään patsaalta.


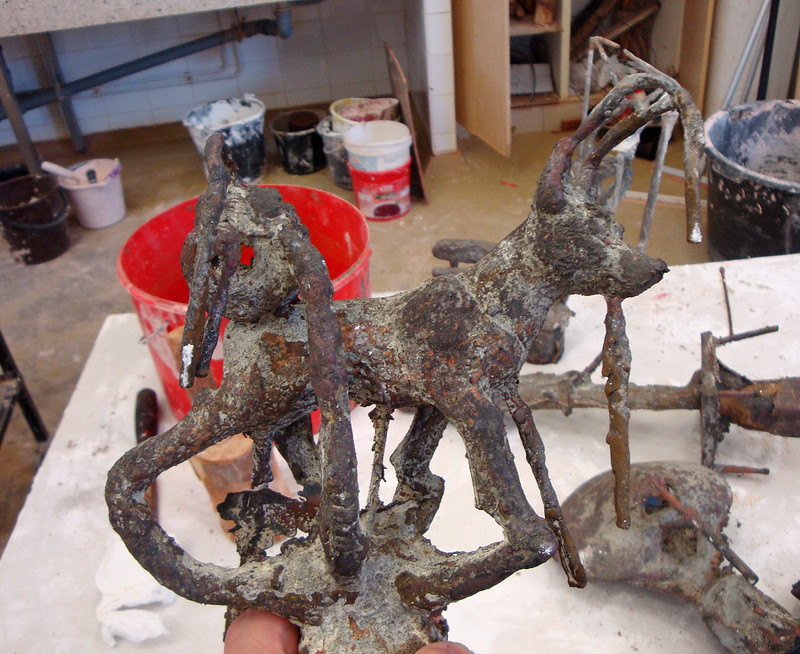
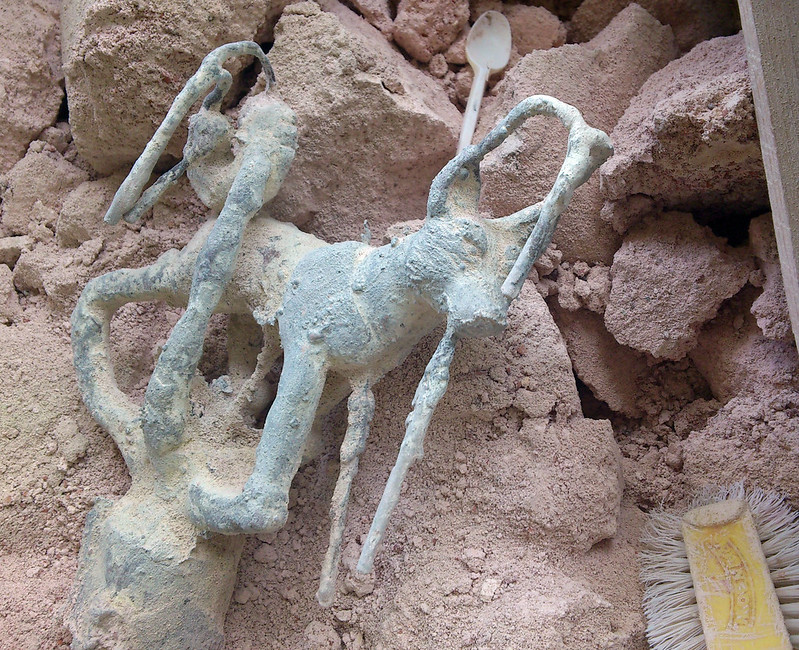
The last remaining grains of sand that were too small to brush off get washed away with water and after that it's time to start thinking about how to get rid of those now-pesky air cast- and air vents (although I must admit he looks cool, like a dog in an alien space-suit or something...).

---

Viimeisetkin hiekanmuruset jotka olivat liian pieniä lähteäkseen harjauksessa pois, pestiin vedellä ja sitten on vuorossa ilmakanavien ja valukanavien poisto (vaikkain niiden kanssa näyttää ihan koiralta jossakin erikoisessa avaruuspuvussa tai jtn.).


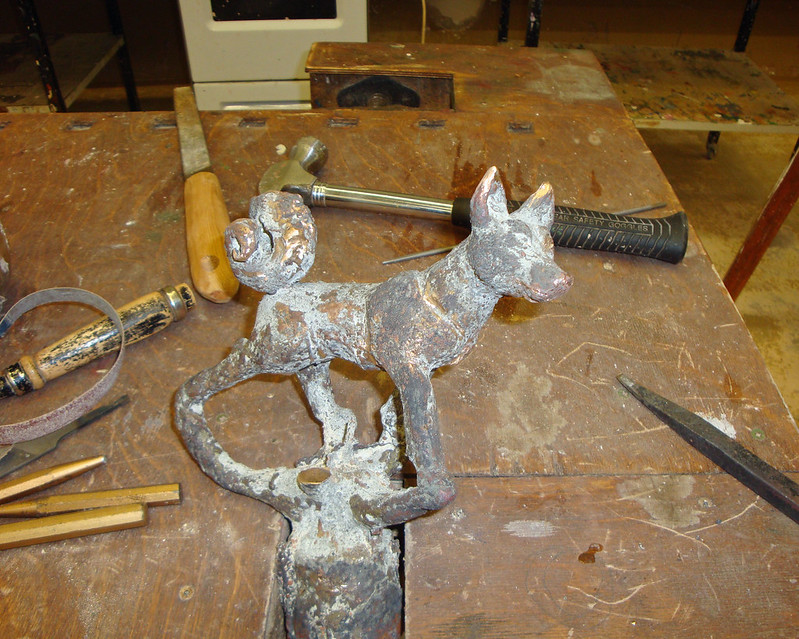
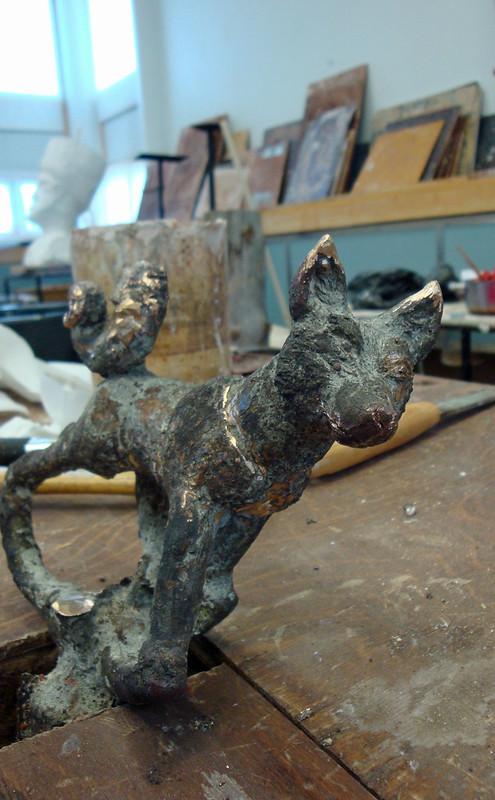
Starting to look more like it should... still some polishing and cleaning up to do!

I had to work on the left eye with tools and make it anew because it didn't come through in the cast properly. This happened probably because the mold stuff hardened up too quickly when we were making the mold around the original wax-sculpture.

Oh well,  think it just adds to the personality of this dog all the more. :3 In art you can't always predict everything beforehand.

---

Nyt alkaa jo näyttää siltä kuin pitäisikin... vielä jäljellä hieman puunaamista ja kiilloittelua!

Minun täytyi työstää koiran vasenta silmää työkaluilla ja tehdä se uudelleen koska se ei valussa toistunut kunnolla. Tämä johtui luultavasti siitä että muottimassa jähmettyi muotintekovaiheessa liian nopeasti.

Noh, tämä vain lisää persoonallisuutta koiralle minusta. :3 Ei taiteessa voi aina ennustaa kaikkea etukäteen.


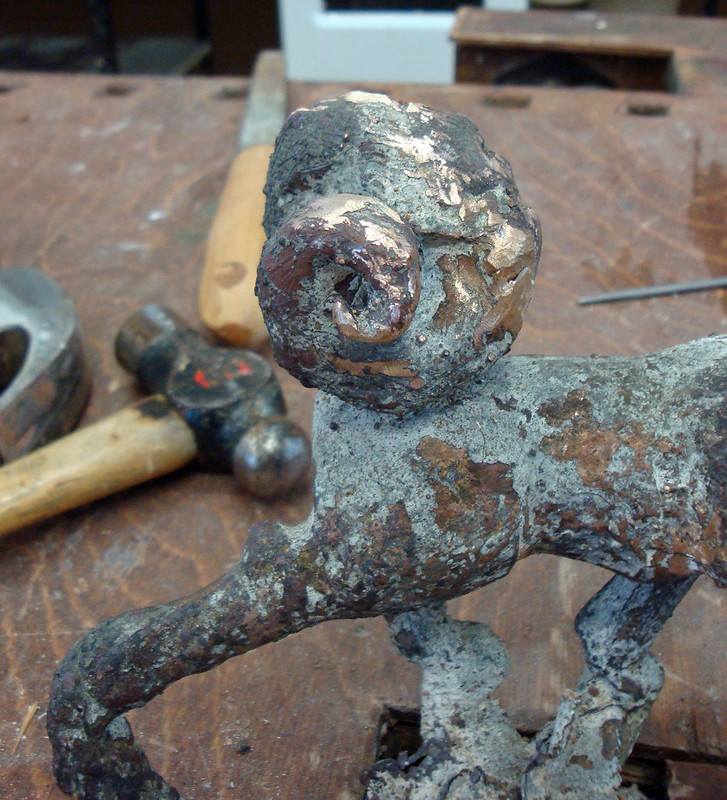
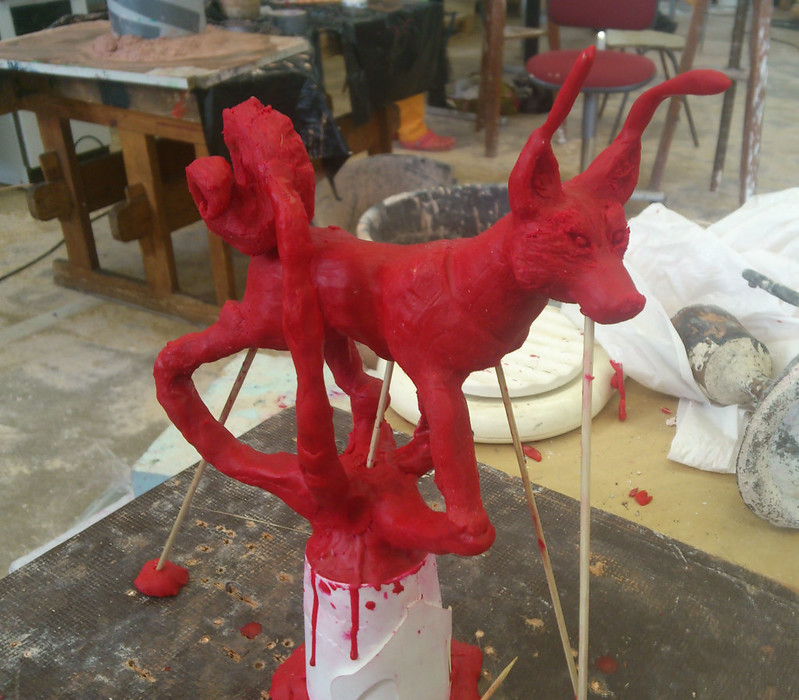
I'm pretty pleased with how the tail turned out. I intentionally made the spiral-like form of the tail exaggerated so that it would have some spike to it. 
I really like spirals as a form (hahaha, no I haven't read too much Uzumaki the manga ;-D)

---

Olen aikas tyytyväinen siihen miten häntä onnistui. Tein tarkoituksella spiraalimaisen muodon liioitellut korostetusti jotta siinä olisi hieman potkua. Tykkään spiraaleista muotona (hahaha, ei en ole lukenut liikaa Uzumaki-mangaa. ;-D )


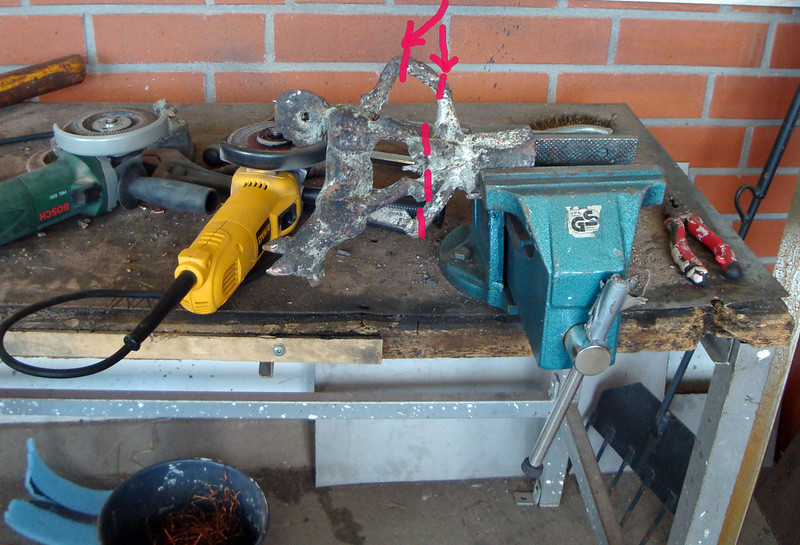
Next up is cutting off the last of the cast vents with an abrasive disc.

----

Seuraavaksi viimeisetkin valukanavat leikataan irti laikalla.


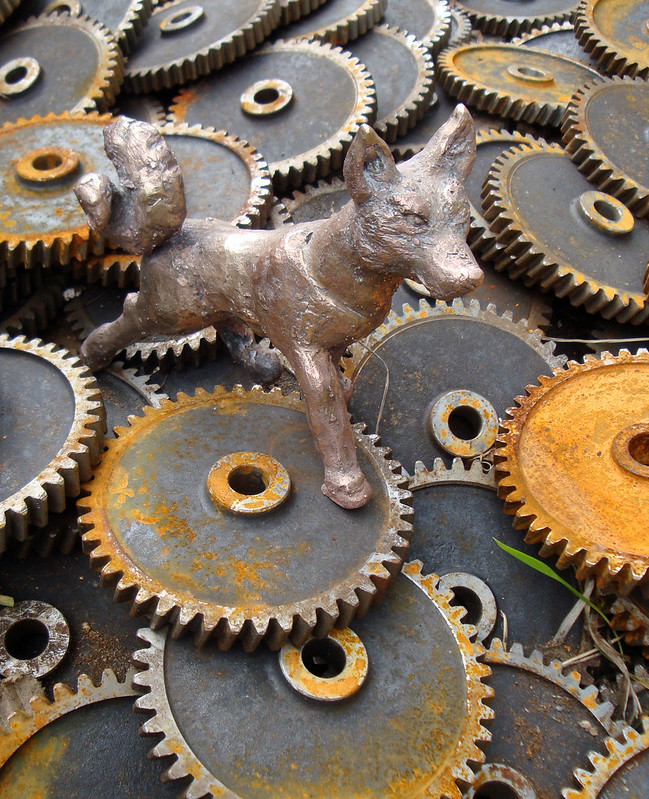
And done! I think the pose came out pretty well and the balance is good.

---

Ja valmista! Minusta koiran asento onnistui aikas hyvin ja tasapainokin on kunnossa.


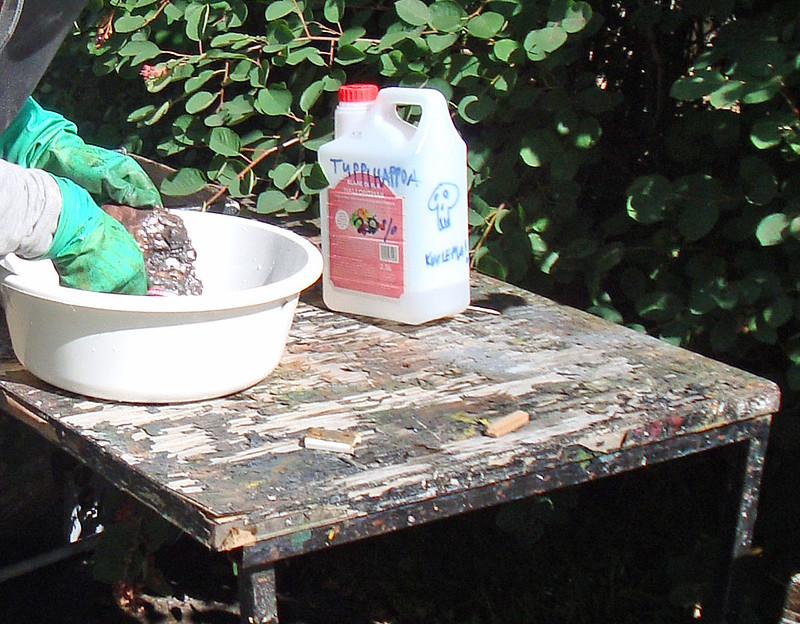
Finishing touches and polishing start with washing the impurities in bronze from the surface of the sculpture with nitric acid. (the text on the container reads; "Nitric acid! Death!" )

Proper precautions must be made when handling acid! During this course I had to handle more possibly dangerous things in ten days  than I have in many years!

---

Viimeistely ja kiillotus alkaa sillä että pestään pronssin pinnasta epäpuhtaudet typpihapolla.

Kuten kanisterissa todetaan, happoa käsitellessä pitää olla varovainen. Tämän kurssin aikana tulin käsitelleeksi kymmenessä päivässä enemmän mahdollisesti vaarallisia juttuja kuin mitä moneen vuoteen olen joutunut tekemään!


...and more polishing with wire brush and some polishing wax ensues in...sparkle dog?

---

Ja lisää puunausta teräsharjan ja kiillotusvahan kanssa johtaa... kimallepiskiin?


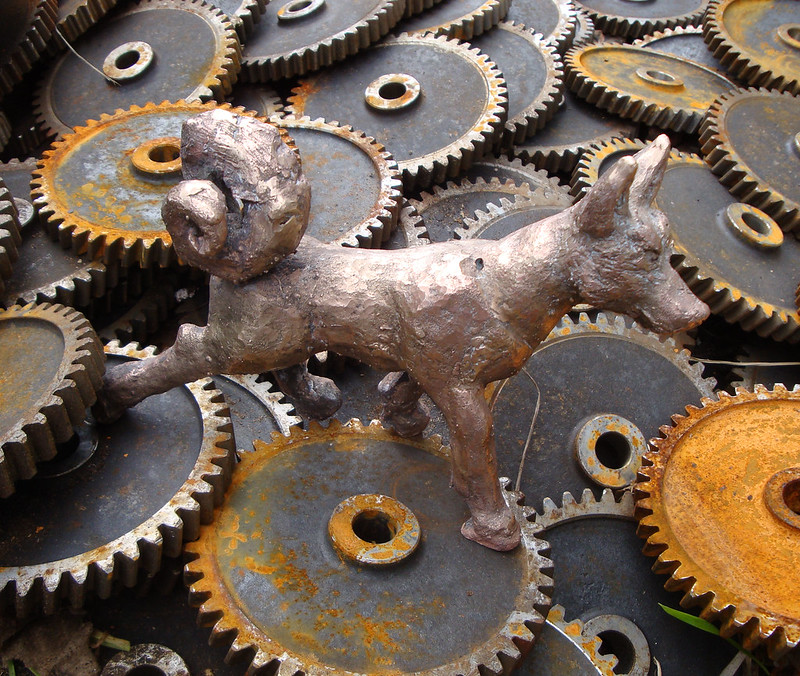
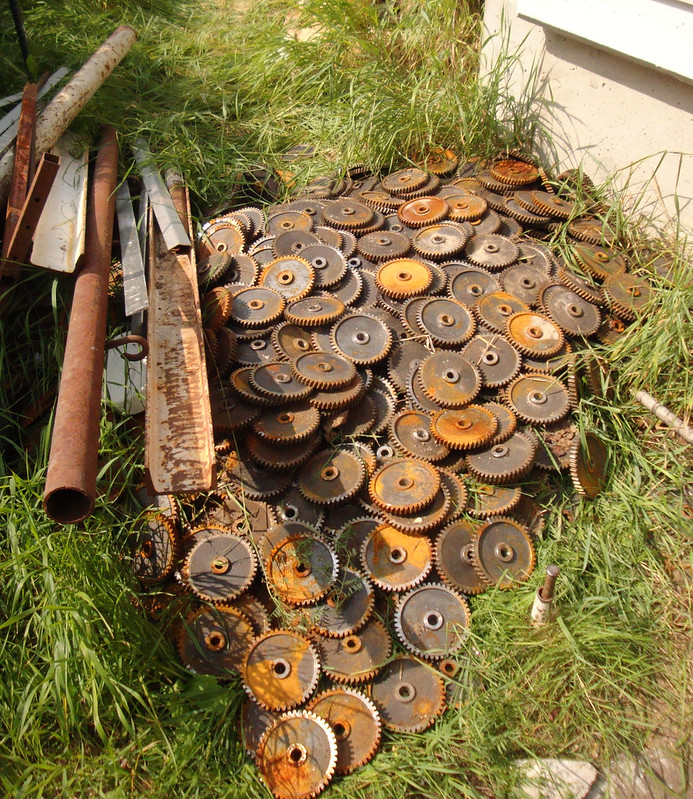
Maybe I'm a bit too attached to those cogwheels...

---

Ehkä saatan olla hieman liian innostunut noista hammasrattaista...


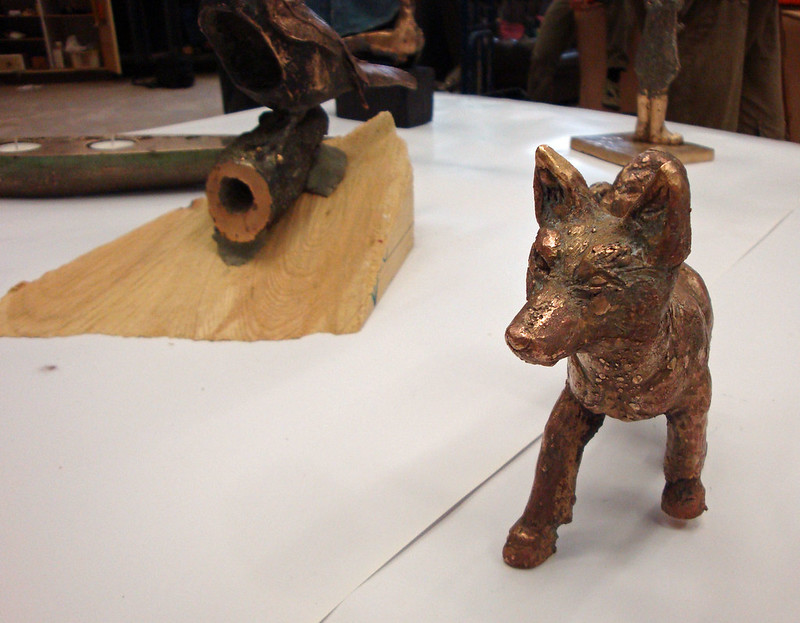
This is how my doggy turned out. I'm rather pleased with him. Since I've never done a bronze statue or anything like this before, I think I did pretty well. If I say so my self (a-hem!). 

I didn't look at any reference pics while sculpting, I don't really like doing that when sculpting (or drawing for that matter). 
Well, sometimes it's necessary to use referential pictures, but usually I just sculpt or draw straight how I see it in my head. I didn't think there was anything special about that but talking to the other people who attended the course, I learned once again to appreciate my own method and artistic view a bit more. I'm very thankful for the deep conversations about art that we had! :-)

---

Tällainen koirulista sitten tuli. Olen aikas tyytyväinen siihen, varsinkin kun ottaa huomioon etten ole aiemmin tehnyt pronssivalua tai vastaavanlaista. Mielestäni onnistuin hyvin, vaikka itse sanonkin (e-heh!).

En muovaillessa katsonut lainkaan referenssikuvia, en yleensä tykkää referenssikuvien katsomisesta jos muovailen/veistän (tai vaikka piirrän).
Noh, toisinaan on pakko katsoa referenssiä (mallia) kuvista, mutta yleensä vain muovailen ja piirrän suoraan siten miten itse asian mielessäni näen. 
En ajatellut että siinä olisi mitään erityistä, mutta kun jutustelin muiden kurssilaisten kanssa, opin taas arvostamaan hieman enemmän omaa tekotapaani ja taiteellista näkemystäni. Olen tosi kiitollinen syvällisistä keskusteluistamme taiteesta joita kävimme! :-)


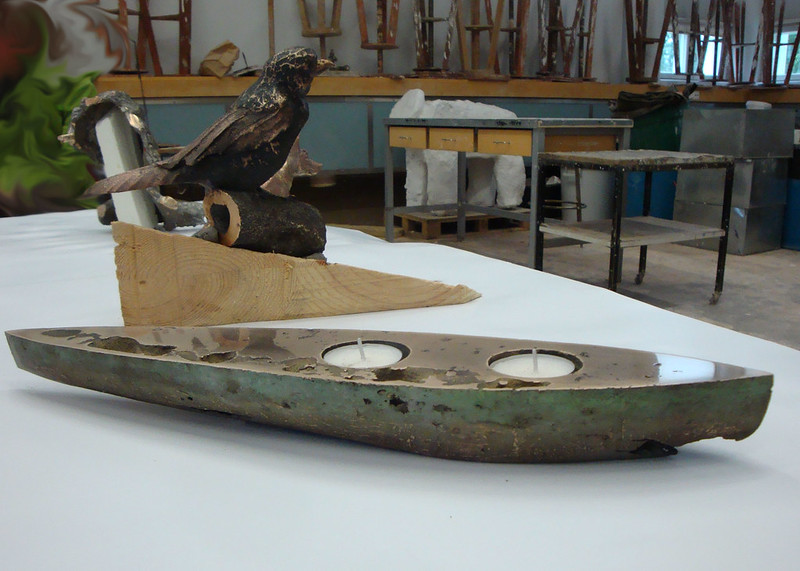
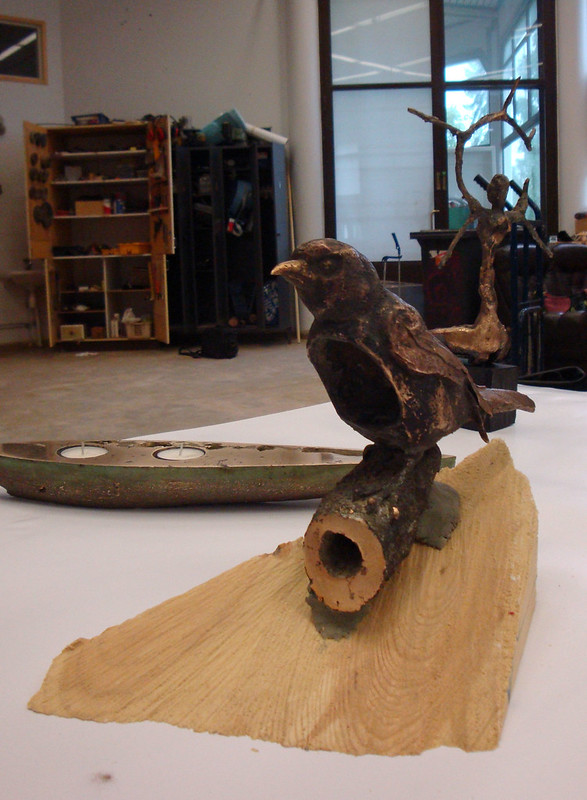
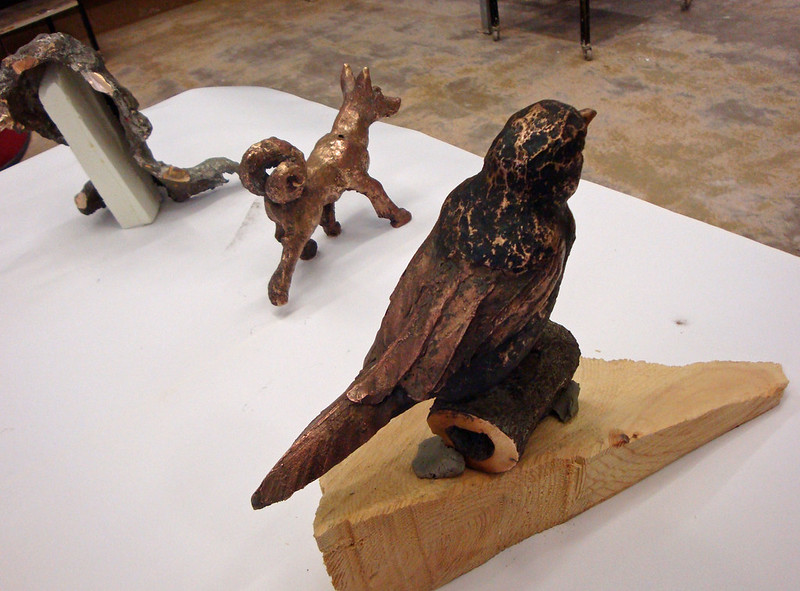
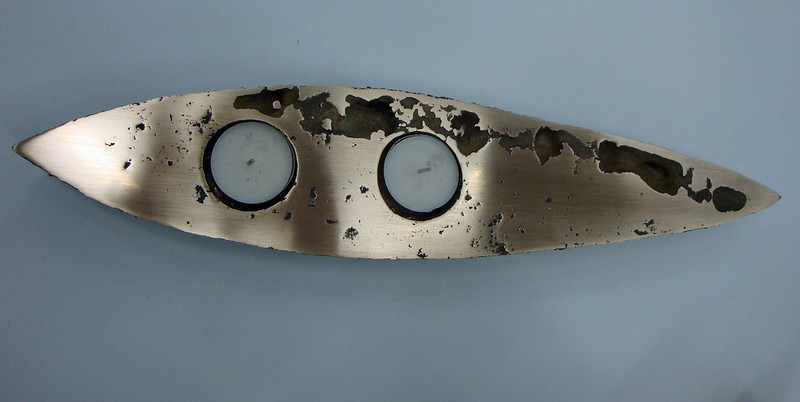
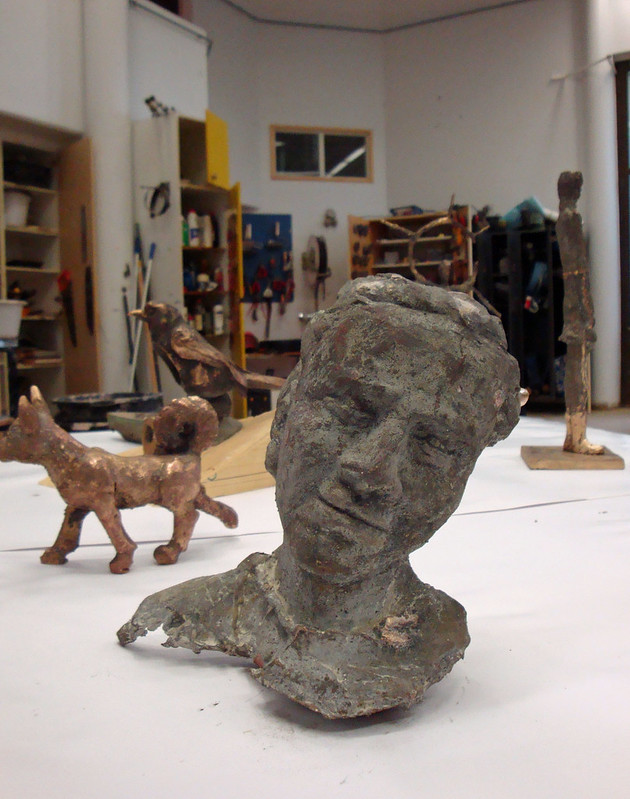
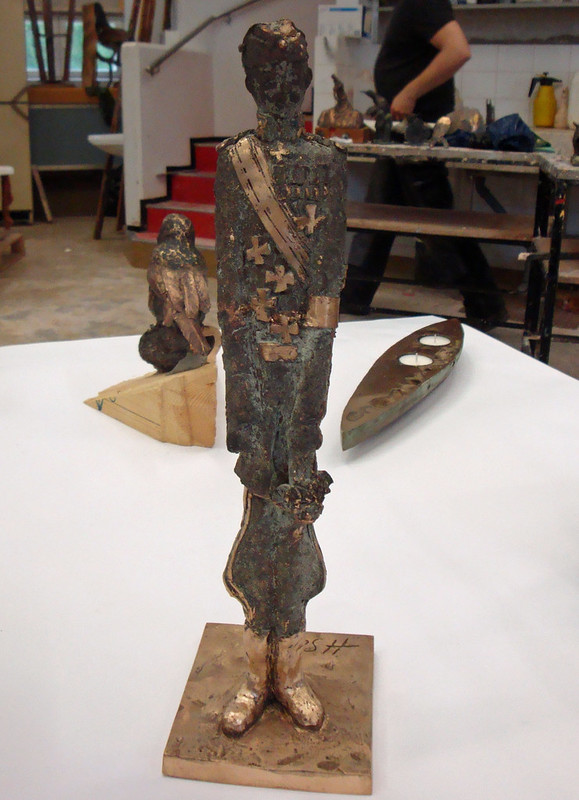
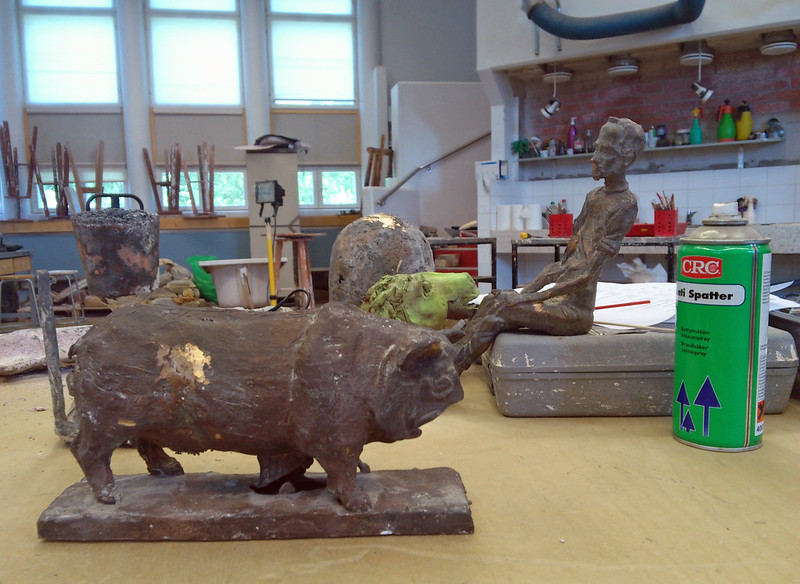
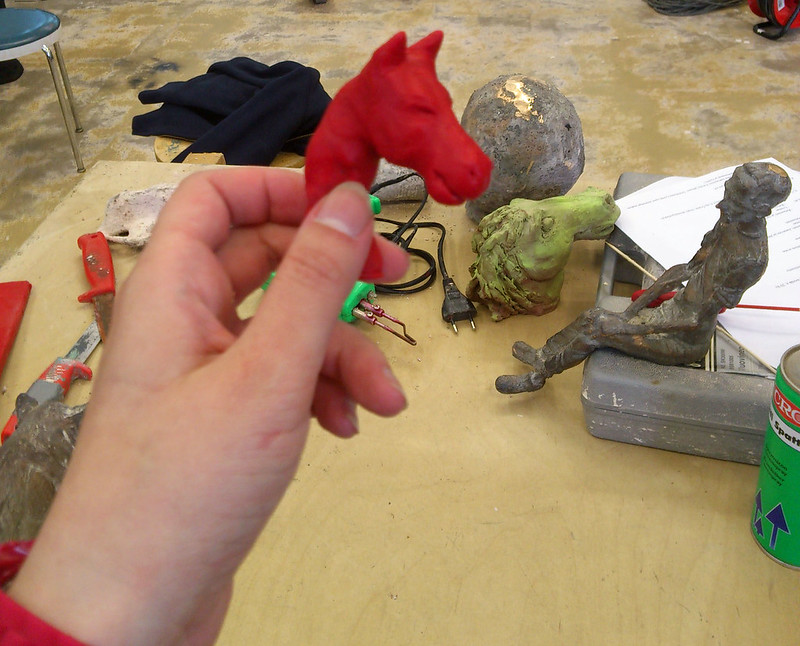
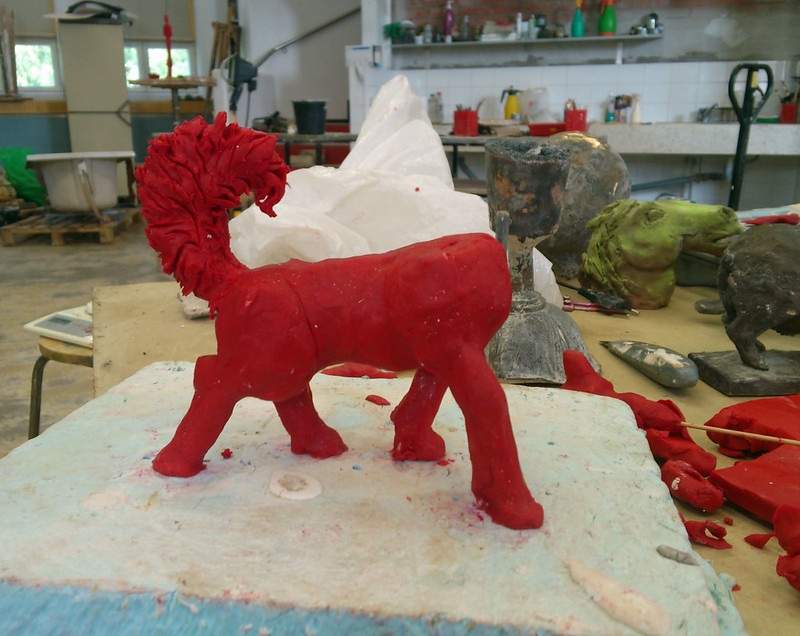
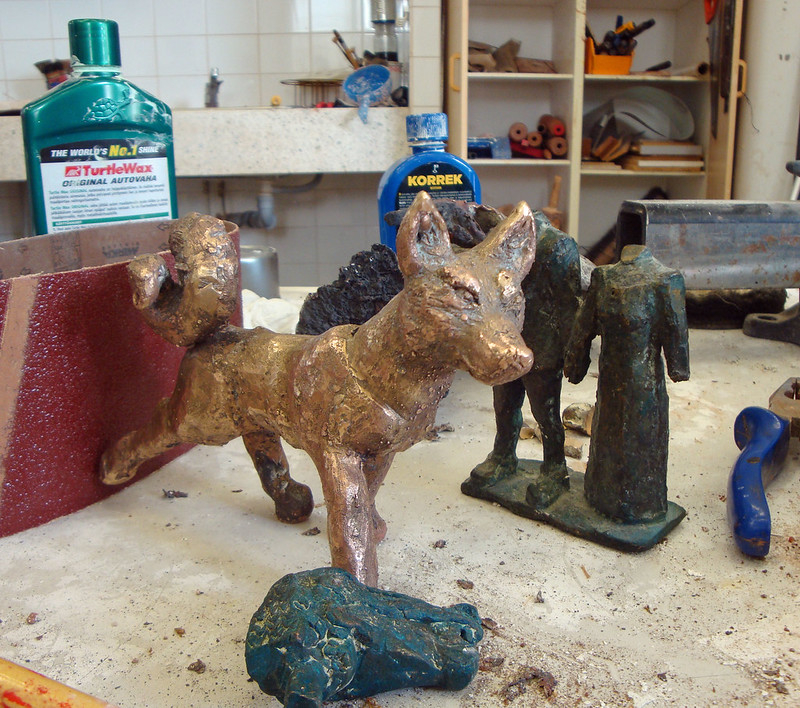
Wanted to show you guys what kind of sculptures the other people on the course made!

I have to say that this was a really unique experience for me and I'd gladly participate in another lost-wax casting course again sometime in the future.
Yes, it was dirty, dangerous and rough work at times, and I literally risked life and limb for this dog statue, but I enjoyed myself.

---

Halusin myös näyttää millaisia teoksia muut kurssilaiset tekivät!

Täytyy kyllä sanoa että oli tosi erityinen kokemus tämä kurssi ja osallistuisin mielelläni uudelleenkin. Kyllä, se oli likaista, vaarallista ja rankkaa työtä välillä, ja kirjaimellisesti asetin henkeni sekä erinäiset ulokkeeni riskialttiiksi tekoprosessissa mutta minulla oli hauskaa!

Saturday, July 20, 2013

Summer Art adventures of the cire perdue kind! (or Ode to Bronze Casting) Part 1


In this series of posts I'll depict the process of lost-wax casting viewed through my eyes.

I wanted to do something art-sy on my summer vacation. Something that I've never tried before. So I decided to attend a lost wax-casting course in Liminka art school, located in Northern Finland, near the city of Oulu.
It was a 6-hour train ride to get there from where I live. But I love travelling and what better way to enjoy the scenery of Northern Finland than sitting in the comfort of the business class and watching through the window, sipping free coffee! ;-D (July is a popular travelling season in Finland and the only seats available to Oulu were in the business class...)

In the pics above you can see the bridge that takes you over Liminka river, straight to the premises of the art school. Also, Percy, my Pipos Limited Cheese Mouse says Hi! to you.
The pic quality is not perfect since my sister insisted on having the better camera to herself, so I only had my cellphone and an old compact digital camera but I hope you'll make do with these pictures!

----

Tässä postaussarjassa esittelen pronssivaluun prosessia miten sen itse koin.

Teki mieli puuhata jotakin taiteellista kesälomalla. Jotakin mitä en ole kokeillut koskaan aikaisemmin. Joten päätinpä sitten osallistua pronssivaluu-kurssille Limingan taidekoululla, Oulun lähellä.
Junamatka sinne kesti suunnilleen kuutisen tuntia, mutta tykkään matkustelusta ja mikäs onkaan parempi tapa kuin nauttia Pohjanmaan maisemista mukavasti business-luokassa istuksien ja ilmaista kahvia hörppien! ( Ilmeisesti festivaalisesongin vuoksi juna oli ihan täyteen buukattu joten ainoat vapaat paikat Ouluun löytyivät business-luokasta.)

Ylläolevissa kuvissa näkyy Liminganjokea ja silta joka vie sen ylitse suoraan taidekoulun alueelle. Percy, Pipos Limited Cheese Mouse:ni sanoo teille Moi!
Kuvanlaatu ei ole parhautta koska siskoni vaati paremman kameran itselleen, minulla oli käytössä vain kännykkä ja ikivanha viimeisiään vetävä digipokkari. Mutta toivottavasti pärjäätte näiden kuvien kanssa!


So this is along the lines what the finished sculpture should look like when casted in bronze. These are some of the example pieces the teachers had made so we could get an idea what this thing was all about.

----

Tältä valmiin työn pitäisi näyttää sitten kun se on valettu pronssiin. Tässä muutamia esimerkkitöitä joita opettajat esittelivät meille jotta saisimme käsityksen siitä mitä tuleman piti.


Step one was to sculpt a piece in wax. After that, proceed to make a mold around the wax-sculpture, then pour hot, melted bronze in the mold. The process is called lost-wax casting because the wax will burn in the mold and the original wax-sculpture is lost.

I've never sculpted in this kind of wax before, so here I'm just testing how to make simple forms out of it.
 The wax we used was called red cheese wax and the primary use for it is - like the name says - coating cheese. It's perk is that it retains its softness, so it'll burn easily and cleanly, which is important so that the bronze will take its place completely in the mold.

----

Ensimmäinen vaihe oli muovailla haluamansa työ vahasta. Sen jälkeen vuorossa olisi muotin teko vahatyön ympärille, johon puolestaan kaadettaisiin sula pronssi. Englanninkielinen "lost-wax casting"-termi tulee siitä, että alkuperäinen vahateos katoaa prosessissa kun se poltetaan muotissa.

En ole aikaisemmin muovaillut tämän tyyppistä vahaa, joten tässä kokeilen hieman miltä se tuntuu käsissä ja miten se käyttäytyy kun siitä yrittää tehdä yksinkertaisia muotoja.
Meidän käyttämämme vahaa kutsuttiin juustonkuorivahaksi ja sen alkuperäinen tarkoitus on - usko tai älä - juustonkuorivahana toimiminen. Vahan hyöty on siinä että se säilyttää pehmeytensä joten se todennäköisesti palaa helposti ja puhtaasti, mikä on tärkeää jotta pronssi ottaa sen paikan muotissa kokonaan.


After testing the sculpting I decided that I wanted to make a fox out of it. Here I'm trying to decide the position of the feet, using wooden sticks to prop the weight on them so that the sculpture holds its form better.

---

Kun olin testaillut vahaa kylliksi, päätin että haluan muovailla ketun. Tässä yritän pähkäillä jalkojen asentoa käyttämällä puisia grillitikkuja tukena.


When the first day was over, I had the basic form of my sculpture done.Most people seemed to think that handling and sculpting wax was difficult, but I found it rather fun!
It was convenient that the wax softened when warmed in hands or above a candle, and hardened again when the temperature got lower.

---

Ensimmäisen päivän aikana sain tehtyä patsaan perusmuodon valmiiksi. Useimpien mielestä vaha oli hieman hankalaa muovailla mutta minusta se oli hauskaa!
Oli kätevää että vaha pehmeni käsissä tai kynttilän liekissä ja jähmettyi taas kun lämpötila laski.


After adding details and working on the pose, the finished wax-sculpture looked like this. I wonder if the master-versions of action figures and the like are made out of something similar to this wax...

What started out as a fox turned out to be a spitz-type dog after all! :-DD I think it's important that you let your work live freely and don't restrict it with following a set plan too narrowly.

---

Kun olin lisännyt yksityiskohtia ja työstänyt veistoksen asentoa, se näytti lopulta tältä. Tehdäänköhän action figuurien ja vastaavien juttujen master-versiot jostakin samankaltaisesta materiaalista kuin tämä vaha...?

Aluksi tästä piti tulla kettu mutta tulikin pystykorvakoira! :-DD Minusta on hyvä että antaa työn elää tehdessä eikä anna ennakkosuunnitteluiden liikaa rajoittaa itseään.


I made a mess and it was fun! On the left you can see the main casting duct forming out on top of a paper cup.

---

Suttasin ja se oli kivaa!!
Vasemmalla voitte nähdä valukanavan muodostuvan pahvimukin päälle.


The casting ducts through which the melted bronze will be poured, were molded from the wax and added to the finished sculpture.

---

Valukanavat, joiden kautta sula pronssi valetaan työhön, muovailtiin myös vahasta ja kiinnitettiin teokseen.

Dog with antennae? Haha!//Koira jolla on antennit? Hahah!


The thinner ducts are air vents that are meant to let air flow freely and assure that there is enough oxygen in the mold that the wax burns completely.

Air vents were made out of wooden sticks coated with wax.

---

Ohuemmat kanavat ovat ilmakanavia, joiden tarkoitus on päästää ilmaa virtaamaan muotin sisällä, jotta on tarpeeksi happea vahan palamiseksi kokonaan.

Ilmakanavat tehtiin puutikuista jotka päällystettiin vahalla.


Next up; making the mold! The mold consists of sand, plaster and really finely crushed bricks mixed with water.

---

Seuraavaksi vuorossa; muotin teko! Muotti koostuu hiekasta, kipsista ja todella hienosta tiilimurskasta jotka sekoitetaan veteen.


The mold in the making! For some reason the mold stuff I made started to harden a bit too quickly and there wasn't enough of it so I had to make a new batch. Probably I mixed it too long... I was starting to get a bit nervous that I ruined the whole sculpture at this point. :-O

The teachers assured me, however, that it was going to be fine.

----

Muotinvalmistusta! Jostain syystä minun muottimassani alkoi jähmettyä liian nopeasti joten se ei ollut tarpeeksi juoksevaa ja loppui kesken. Minun oli tehtävä uusi muottimassa ja kaataa se vielä päälle. Luultavasti tämä johtui siitä että sekoitin massaa liian pitkään... Alkoi hiukan huolestuttaa menikö koko työ pilalle tämän vuoksi... :-O

Opettajat tosin lohduttivat että kyllä työ onnistuisi tästä huolimatta.


Now it's off to the kiln or the oven with the finished molds!
The oven was built on spot around the molds.

---

Sitten vaan valmiit muotit uuniin!
Uuni rakennettiin paikan päällä muottien ympärille.


It takes about 20 hours in approximately 750-800 degrees Celsius for the wax to get burned out in the kiln, leaving a hollow negative-space inside the mold into which the melted bronze will be poured.

---

Kestää noin 20 tuntia 750 - 800 asteessa että vaha palaa muottien sisällä muodostaen onton, vahapatsaan muotoisen tilan muotin sisälle, johon sula pronssi myöhemmin kaadetaan.


We took turns to keep an eye on the kiln, you had to check the temperature and keep it even on all sides of the kiln. Also it was important to make sure that the flame wouldn't go out and that the gas was burning all the time.

Don't try this at home kids. This was pretty scary stuff, I tell you!
I'll leave you with a cliffhanger in this post, next time you'll see the finished piece and how it turned out! :-)

---

Me kurssilaiset valvoimme uunia vuoroissa, lämpötilan piti pysyä tasaisena koko uunin mitalta. Oli myös tärkeää että liekki ei sammuisi ja että kaasu pysyisi palamassa.

Älkää kokeilko tätä kotona, lapset. Tämä oli aikas jänskää!
Jätän teidät tämän postauksen kanssa cliffhangeriin; ensi kerralla näette valmiin teoksen ja miten sen kanssa kävi, onnistuiko vai ei! :-)


BONUS-Pics;
I did some serious treasure-hunting during my stay in Liminka. These wonderful, rusty cogwheels for example were a great find! The art school had got them as a donation from some machinery workshop that didn't need them anymore and there were more than they could use so I got to take some with me!

I've been looking for this kind of cogwheels, I think they'd make a wonderful background for photographing my robot dolls! You can imagine my joy when I discovered this pile~ (the things I can get my kicks out of... ;-DD)
----

BONUS-kuvia;
Minulla oli melkoisia aarteenmetsästyshetkiä Limingassa! Esimerkiksi nämä mahtavat ruosteisen hammasrattaat olivat mielettömän hyvä löytö! Taidekoulu oli saanut ne lahjoituksena joltakin työpajalta jossa niitä ei tarvittu enää ja niitä oli todella paljon joten muutama liikeni minullekin!

Olen etsiskellyt tällaisia hammasrattaita, minusta niistä tulee ihan loistava tausta androidi-nukke-valokuville! Voitte vain kuvitella miten innostunut olin kun löysin tämän keon~ (kaikista jutuista minäkin saan kicksini, hehe... ;-DD )